When setting up WordPress, it is important to follow best practices to ensure your site is secure and runs optimally. This includes making sure your WordPress necessary security configurations are applied, that the WordPress environment (core, plugins and themes) is kept up to date, applying and ensuring your hosting environment is secure. It is also important to create a secure password, backup your website regularly, and create a backup plan in the case of any unexpected issues. Following these best practices when setting up WordPress is essential to keeping your website safe and secure.
Choosing the right hosting for WordPress
WordPress is one of the most popular and user-friendly content management systems (CMS) available, and choosing a hosting provider that is compatible with your WordPress site is an important step in setting up your website. There are many hosting companies who specialize in WordPress hosting, and they provide features that are tailored to meet the needs of WordPress users. These hosting companies provide reliable and secure hosting, as well as high-performance servers and premium support. They also offer a variety of features such as one-click installation, automated backups and security features, and more. When choosing a WordPress hosting provider, make sure to research the features and services offered, as well as the customer reviews and ratings. With the right hosting provider, you can be sure that your WordPress site will be running smoothly and securely.
Installing WordPress
Installing WordPress can be a simple and easy process, whether it is done manually or with a 1-click setup. Manual installation requires the user to download WordPress, upload the files to their server or web hosting space, create a database, and run the installation by browsing the domain. On the other hand, 1-click setup simplifies the process by providing a script to automatically install WordPress with a few clicks. Both methods provide a quick and efficient way to get WordPress up and running on a server.
Configuring WordPress after installation
Increase PHP memory limit in WordPress to utilise the memory available in your hosting package
Increasing the memory limit in WordPress config.php is an easy and important step to take in order to ensure that your website functions properly. To increase the PHP memory limit for WordPress, you will need to locate the “wp-config.php” file which is located in the root of your WordPress installation. Once located, add the following line of code:
define( 'WP_MEMORY_LIMIT', '512M' );This will increase the memory limit to 512MB. After adding this code, save the wp-config.php file and upload it to your server. This will increase the memory limit, allowing WordPress to access the extra memory it needs to operate.
Prevent directory listing
To prevent directory listing in WordPress, which could make sensitive information available to hackers, it is important to ensure that the correct permissions are set for each of these directories. This can be done by manually editing the .htaccess file and adding the following line of code after # END WordPress:
Options -IndexesHide WordPress version meta tag
It is important to hide the WordPress version meta tag because it reveals your website’s WordPress version to potential attackers. This allows them to look for known vulnerabilities in the version you are using and exploit them. Hiding the WordPress version meta tag helps to protect your website from potential attacks and keep your data safe. It is recommended to always keep the version of WordPress up to date and hide the meta tag to ensure the best security for your website.
To remove the WordPress version meta tag from your website’s source code, you can use the following code snippet in your theme’s functions.php file:
// Hide WordPress version meta tag
// More snippets at wpunplugged.com

function wpunplugged_remove_version_info() {
return '';
}
add_filter('the_generator', 'wpunplugged_remove_version_info');
This will remove the WordPress version meta tag from the head section of your website’s pages.
Alternatively, you can use a plugin to accomplish this.
Remove emoji support for older browsers
Emoji support in WordPress is a feature that allows browsers to display emojis, which are small images or icons used to express emotions or ideas. This feature is especially helpful for older browsers that may not be able to display the newer emojis available. However, it is recommended to remove emoji support from WordPress as it can slow down your website and cause conflicts with other plugins. Removing emoji support can also free up resources and improve your website’s security and performance.
To remove emoji support for older browsers in WordPress, you can use the following code snippet in your theme’s functions.php file:
// Hide WordPress version meta tag
// More snippets at wpunplugged.com

function wpunplugged_remove_emoji_support() {
  remove_action( 'wp_head', 'print_emoji_detection_script', 7 );
  remove_action( 'wp_print_styles', 'print_emoji_styles' );
}
add_action( 'init', 'wpunplugged_remove_emoji_support' );
This will remove the emoji detection script and styles from being added to the head section of your website’s pages.
Alternatively, you can use a plugin to accomplish this.
Remove wlwmanifest.xml
Wlwmanifest.xml is a file commonly found in WordPress websites. It is a Windows Live Writer manifest file which is created when a user publishes a post on WordPress using Windows Live Writer. This manifest file contains metadata about the post, such as its title, author, date and categories. Although the Wlwmanifest.xml is a harmless file, it is recommended to remove it from the WordPress website as it can potentially be used as a security risk. If a hacker were to gain access to the file, they could use the data to gain more information about the website.
To remove the wlwmanifest.xml file in WordPress, you can use the following code snippet in your theme’s functions.php file:
// Remove wlwmanifest.xml
// More snippets at wpunplugged.com

function wpunplugged_remove_wlwmanifest_link() {
  remove_action( 'wp_head', 'wlwmanifest_link' );
}
add_action( 'init', 'wpunplugged_remove_wlwmanifest_link' );
This will remove the wlwmanifest.xml link from the head section of your website’s pages.
Remove RSD link
RSD (Really Simple Discovery) is a type of link element used in WordPress, which enables external services to discover the XML-RPC interface of WordPress. This can be used by web services that rely on XML-RPC, such as the Jetpack plugin. However, in some cases, it can also be used by malicious actors to find vulnerable WordPress websites, so it is important to remove RSD if it is not necessary. Removing RSD can help to protect your website from security threats, as well as improve performance.
To remove the RSD link in WordPress, you can use the following code snippet in your theme’s functions.php file:
// Remove RSD link
// More snippets at wpunplugged.com

function wpunplugged_remove_rsd_link() {
  remove_action( 'wp_head', 'rsd_link' );
}
add_action( 'init', 'wpunplugged_remove_rsd_link' );
This will remove the RSD link from the head section of your website’s pages.
Apply security measures in WordPress after installation
Use a unique and secure username and password for your WordPress admin login
Using a unique and secure username and password for your WordPress admin login is essential to ensure your website remains secure. It is important to choose a username that is difficult to guess and a password that is at least 8 characters long and contains a combination of letters, numbers, and symbols. Do not use the same username and password combination for multiple websites or accounts and make sure to update your password frequently to keep your website secure.
Enable MFA (multi-factor authentication) for WordPress admin accounts
Enabling MFA for your WordPress admin account is an important security measure to help protect your website from malicious attacks. MFA helps verify that it is you, the legitimate user, logging into your WordPress admin account by requiring a secondary authentication factor. This secondary factor can be in the form of a one-time code sent via text or email, a physical security key, or a biometric factor like a fingerprint or facial recognition. This additional layer of security helps ensure that only you are able to access your WordPress admin account, even if your password is compromised. MFA provides an added layer of protection that can help keep your website safe from malicious attacks.
Recommended MFA plugins for WordPress:
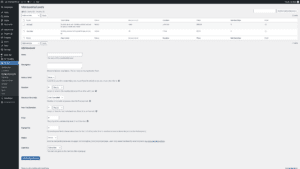
Enable WordPress auto-updates
Enabling WordPress auto-updates is a great way to keep your website secure and up-to-date. Auto-updates will automatically install the latest version of WordPress and its associated plugins and themes. This will ensure that your website is running the latest version of WordPress, which can help protect against security vulnerabilities and other issues. Additionally, auto-updates will install important bug fixes and feature updates, helping to keep your website running smoothly. To enable WordPress auto-updates, simply go to the WordPress dashboard and select the “Auto-Updates” option. From there, you can choose which updates to enable and when they should be installed. Enabling WordPress auto-updates is a great way to keep your website secure and running smoothly.
Enable a backup solution
Backup for WordPress is an essential part of a secure and efficient website. It helps to protect your website against data loss, malicious attacks, and other unforeseen issues. Having a regular backup of your WordPress site ensures that you can quickly restore your website to a fully operational state in the event of an emergency. Additionally, backups are useful for making sure that you can keep track of your website’s progress over time and make sure that any changes you make are not lost. Backing up your WordPress site is a necessary step to ensure that your website remains secure and reliable.
Recommended backup plugins for WordPress:
- UpdraftPlus
- Jetpack
- WP Time Capsule
Enable a WAF (Web Application Firewall) in WordPress
Using a web application firewall (WAF) with WordPress is an essential security measure for any website. WordPress is an incredibly popular platform for websites and blogs, making it an attractive target for malicious hackers. A WAF can protect your site from malicious attacks by using a set of rules to filter out malicious traffic, such as cross-site scripting and SQL injections. It can also prevent brute force attacks, which are attempts to guess a user’s password. Overall, a WAF is an effective way to protect your WordPress site from security vulnerabilities and malicious attacks.
Recommended Web Application Firewall plugins for WordPress:
- WordFence Security
- Sucuri Security
Adding a external monitor service to WordPress (Optional)
Adding a external monitoring service to your WordPress website is a great way to ensure that your website is running optimally and securely. With a monitoring service, you can receive real-time notifications of any problems that arise with your website, such as server outages, performance issues, and security breaches. You can also receive reports and statistics to help you track the overall performance of your website. This allows you to make timely changes and improvements whenever needed to ensure your website is running smoothly and efficiently. Additionally, some monitoring services even offer additional security features, such as malware scanning, to help keep your website safe from malicious attacks.
Recommended monitoring services for WordPress:
- Jetpack
- Uptime Robot